|
||||
Styles — Pure EfficiencyWritten and published May 10, 2000 Following along with spaces, paragraphs, and tabs, I thought I'd introduce styles. Have you ever created an entire long document only to find it just misses fitting on four pages instead of five and wondered what you could do to make it fit better, without reducing the font size? Have you ever created a document, like a legal pleading or contract, only to find you need to change the numbering format? These types of format changes and many more can be tedious (and incredibly inefficient) if you haven't used styles. But if you've used a style for the text in question, your change will take only moments. I can't teach you all about how to use them in this column, as they vary from program to program, but perhaps I can convince you to take a look at styles in your programs of choice and give them a try. What's A Style and Why Use One?Styles are groups of formatting attributes that you create once, then apply over and over again. When you edit a style, all text that has that style is changed automatically to reflect the change. This makes it incredibly easy to give your document the look you desire. First, the BasicsIt's difficult for me to talk about styles without a demo, so I'll use Word 98 to show you how they work. From there, if you like styles, you can use your favorite program's Help to learn how to create and use styles in that app. To follow along: 1. Start a blank page.
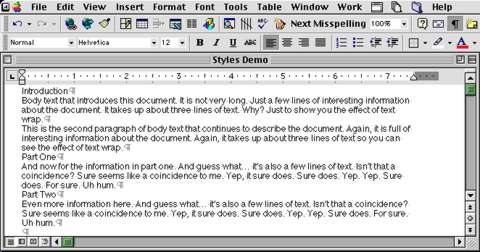
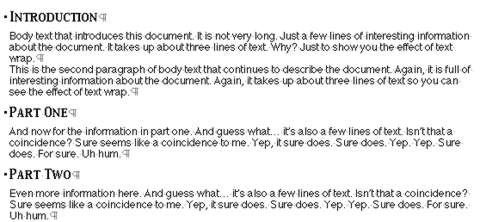
2. Type:
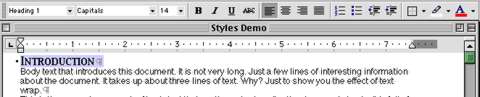
Notice there are no extra lines of spacing between paragraphs. Now let's create a style. 3. Select the line that contains Introduction. (The whole line, which includes the P marker.) 4. Format that line as desired. I've given it a specific font and made it 14 points. I also want to add spacing around the heading but we'll get to that later so you can see what it's like to make a change. Note that Word automatically labeled my larger text "Heading 1." I didn't do that and wish, for this demo's sake, that it hadn't. Just ignore that.
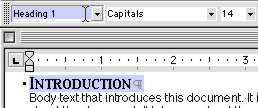
5. With the Introduction line still selected, click in the Style field in the toolbar. This selects the current style name.
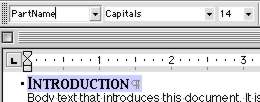
6. Enter a new style name that you'll recognize later.
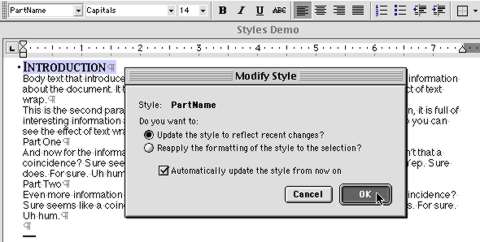
7. Press Enter (not Return). 8. With the settings I have selected, click OK.
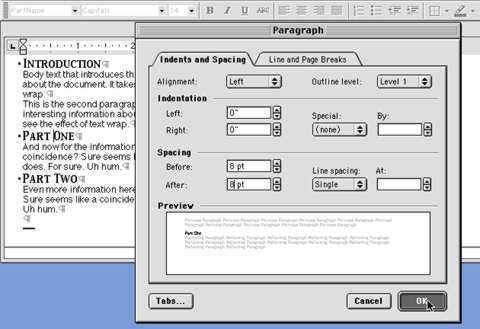
This creates the style based on the selected text. The checkmark about updating styles will cause all text that contains this style to change automatically when the style is changed. Now to apply that style to the other headings. 9. Click within the line that contains "Part One," and choose your new style from the pop-up arrow to the right of the style field. This applies the same style to that heading. Then do the same for the "Part Two" heading. 10. Click anywhere within any line that has this new style applied. I clicked in Part One. 11. Choose Format->Paragraph because we want to format that paragraph. Set your paragraph as desired. I have chosen to put 8 points of space before every occurrence of my PartName and another 8 points after each occurrence of my PartName. Then click OK.
Notice that each of the headings now reflects the new paragraph formatting.
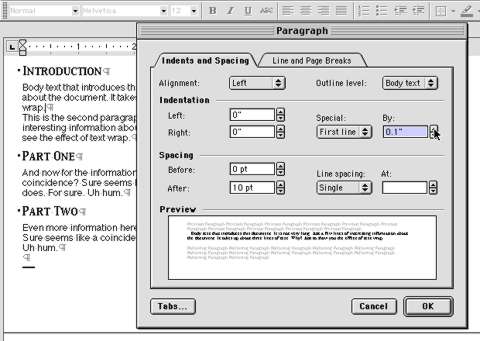
Remember my opening example about needing to shorten up your document? Pretend for a moment this is such a document. It has many part headings. By placing your mouse in any heading line, choosing Format->Paragraph, then changing the space after from 8 to 7 points, you can change each heading. If you have 10 headings on the page, you'd close your text up 10 x 1 = 10 points. Not enough? Change the space after to 6 points. That shortens your document by a full line. (A bit more really.) 12. You can continue and format the body text too. Just click inside any body text line and format that paragraph. In the example below, I also indented the first line of the paragraph about an "em" space (proper printer's indent -- the width of a capitol letter M for that font) by choosing something close: .1 inch.
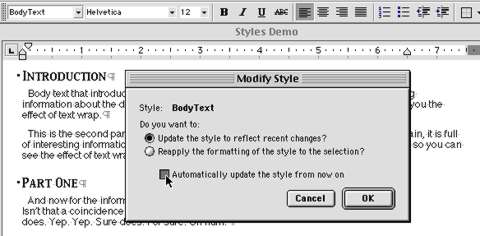
13. Make this a style too. With the cursor still in that paragraph, click again in the Style field, type a name, press Enter. If presented with the Style dialog, tell the style to update automatically, then click OK. If you're not presented with the Style dialog, the style will be created silently. 14. Apply that formatting to the other body paragraphs by selecting each paragraph, then choosing the style from the Style menu. 15. This time try a different change method. Click in any body paragraph that has the style. I am in the Part One body paragraph as I change the right margin. So far I just changed that single paragraph. But now... 16. Click in the Style field and press Enter. Then tell it to update the style (because you want it to do that in this case). Since you also want changes to this style to always be consistent among its so-formatted paragraphs, check the Auto-update box. Then click OK, as below.
Notice all body paragraphs are now changed. You can also apply a style on a character level, instead of an entire paragraph. Try this: 17. Select a word or a few characters, then format it using the normal tools on the toolbar/ruler. I selected "Why?" and made it red, bold, and underlined. 18. Make this a style too. With that text still selected, click in the Style field, type a name, press Enter. If presented with the Style dialog, tell the style to update automatically, then click OK. If you're not presented with the Style dialog, the style will be created silently. (When you change it later, you may need to tell it to update automatically.) (This is similar to step 13.) 19. To apply that style elsewhere, select the text to which you want the character level style applied, then choose the style from the Style menu, as is being done to "Yep," below. (In this shot, the generic Body Text style is the current style, but I'm changing the selected text to the red style.)
Since this text already has a paragraph style, that takes precedent. When I select the red text the red style doesn't appear in the Style menu. Therefore, when I change the red text to blue, the style isn't updated throughout the document. To edit a character level style, you need to go to Format->Style, then click the style name, click Modify, and make your changes. Play around in your document, changing styles to your heart's content to get the hang of things. Note: Remember that in week's past I said a paragraph marker carries down its formatting? If you create a style and apply it to one paragraph, then click in front of that paragraph's marker and press Return, the style is carried downward. It is not necessary to apply a style manually to every paragraph. (I did it the other way so you can see the text change.) ConclusionStyles take a bit of time to set up and (maybe) a moment to apply to each paragraph. In a short document or a simple letter to a friend, it doesn't pay to use them. But in any long document or an intricate one, such as a resume, styles are truly efficient. Next WeekNext week I'll discuss the key to effective word processing. |
||||
|
|
|
• • • Next Column
|
||